Designer: Mazayka Toys
Instagram: @mazayka_toys
Difficulty Level: Beginner
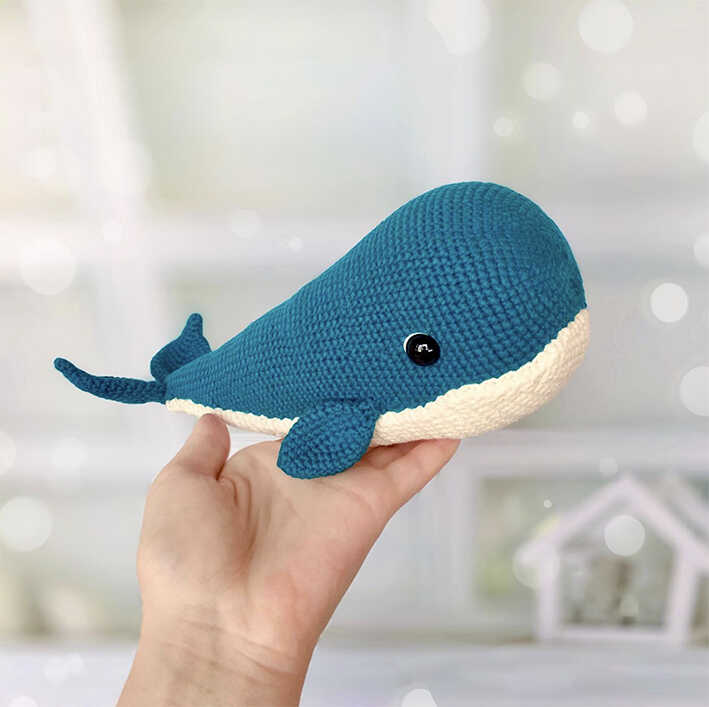
A soft and charming ocean-themed amigurumi project to enjoy during your crochet time.
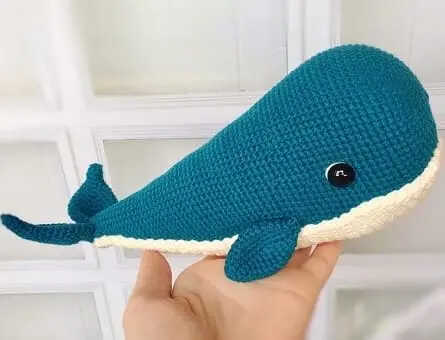
This free amigurumi whale pattern is designed by Mazayka Toys and inspired by the warm, gentle atmosphere of ocean life. With its rounded shape and sweet expression, this whale makes a lovely choice for DIY Crochet Gift Ideas, nursery decor, or cozy handmade toys. You will also find inspiring amigurumi whale ideas shared at the end of the pattern. With its clean and balanced look, the design fits naturally into Easy Crochet Projects and Low Sew or No Sew Amigurumi Patterns, and we sincerely thank Mazayka Toys (@mazayka_toys) for sharing this beautiful whale creation.
This pattern is written as a beginner amigurumi whale pattern using a step by step, beginner friendly structure and basic stitches only. The head and body are crocheted in one piece, which keeps sewing to a minimum, with only the tail, belly, and fins attached at the final stage. If you have been wondering how to crochet an amigurumi whale that looks adorable while remaining easy to follow, this project is an ideal place to start. Difficulty Level: Beginner, and it also works perfectly as a Quick to Make Amigurumi.
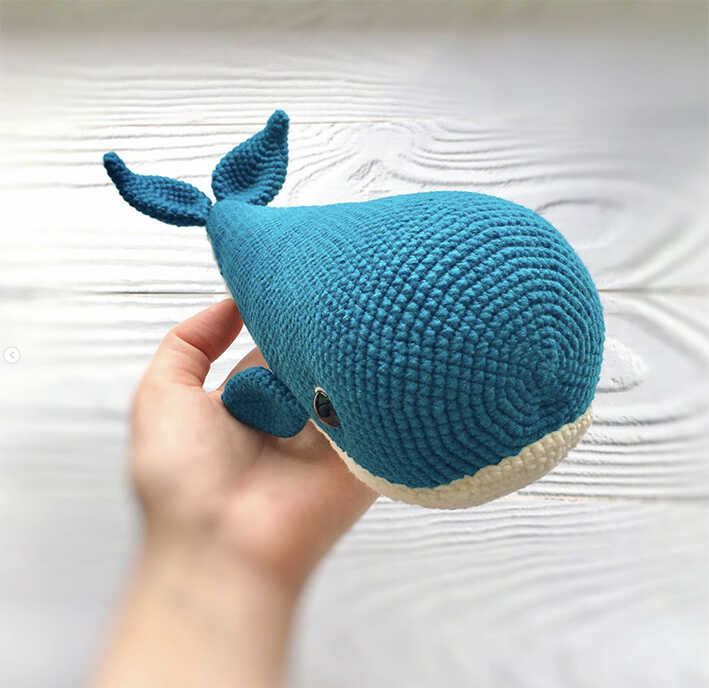
The pattern is designed using cotton yarn for a clean and well-defined stitch finish, while velvet yarn can be used to create a much larger, chunky plushie—please note that using velvet yarn will significantly increase the final size. The finished whale measures approximately 22 cm (8.5″) in length and can be completed using yarn, a suitable crochet hook, fiberfill stuffing, and a yarn needle for minimal assembly. If you enjoy small and playful animal projects, you may also like the tiny bee amigurumi keychain, another quick and charming design shared on our blog.
Materials:
- Alize Cotton Gold yarn #17, YarnArt Jeans yarn #62
- 2.0 mm crochet hook
- 13 mm half beads for eyes
- Large eye long needle
- Scissors
- Sewing pins
- Fabric glue
- Fiberfill
Abbreviations:
R – row
ch – chain
st – stitch
sc – single crochet
inc – increase (2 single crochet in 1 stitch)
dec – decrease
[…] – number of stitches you should have at the end of the row
(…) – repeat whatever is between the brackets the given number of times
CUTE CROCHET WHALE WITH SIMPLE STITCHES
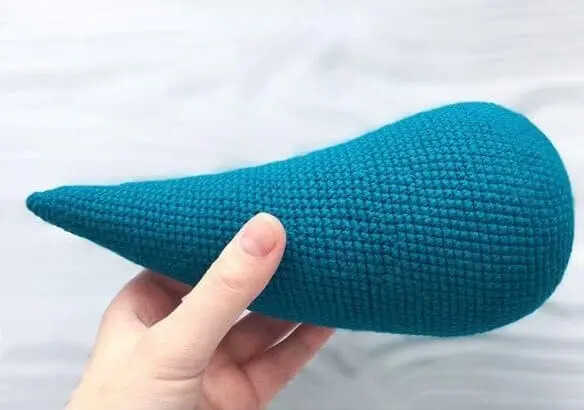
Head and Body
(one piece)
Stuff as you go.
R 1: 6 sc in magic ring [6]
R 2: (inc) repeat 6 times [12]
R 3: (1 sc, inc) repeat 6 times [18]
R 4: (2 sc, inc) repeat 6 times [24]
R 5: (3 sc, inc) repeat 6 times [30]
R 6: 2 sc, inc, (4 sc, inc) repeat 5 times, 2 sc [36]
R 7: (5 sc, inc) repeat 6 times [42]
R 8: 3 sc, inc, (6 sc, inc) repeat 5 times, 3 sc [48]
R 9: (7 sc, inc) repeat 6 times [54]
R 10: 4 sc, inc, (8 sc, inc) repeat 5 times, 4 sc [60]
R 11: (9 sc, inc) repeat 6 times [66]
R 12: 5 sc, inc, (10 sc, inc) repeat 5 times, 5 sc [72]
R 13: (11 sc, inc) repeat 6 times [78]
R 14-28: 78 sc (15 rows)
R 29: (11 sc, dec) repeat 6 times [72]
R 30-31: 72 sc (2 rows)
R 32: 5 sc, dec, (10 sc, dec) repeat 5 times, 5 sc [66]
R 33: 66 sc
R 34: (9 sc, dec) repeat 6 times [60]
R 35-42: 60 sc (8 rows)
R 43: (8 sc, dec) repeat 6 times [54]
R 44-48: 54 sc (5 rows)
R 49: dec, 4 sc, dec, 40 sc, dec, 4 sc [51]
R 50: 51 sc
R 51: dec, 4 sc, dec, 37 sc, dec, 4 sc [48]
R 52: 48 sc
R 53: dec, 4 sc, dec, 34 sc, dec, 4 sc [45]
R 54: 45 sc
R 55: dec, 4 sc, dec, 31 sc, dec, 4 sc [42]
R 56: 42 sc
R 57: dec, 4 sc, dec, 28 sc, dec, 4 sc [39]
R 58: 39 sc
R 59: dec, 4 sc, dec, 25 sc, dec, 4 sc [36]
R 60: 36 sc
R 61: dec, 4 sc, dec, 22 sc, dec, 4 sc [33]
R 62-63: 33 sc (2 rows)
R 64: dec, 4 sc, dec, 19 sc, dec, 4 sc [30]
R 65: 30 sc
R 66: dec, 4 sc, dec, 16 sc, dec, 4 sc [27]
R 67: 27 sc
R 68: dec, 3 sc, dec, 15 sc, dec, 3 sc [24]
R 69: 24 sc
R 70: dec, 3 sc, dec, 12 sc, dec, 3 sc [21]
R 71: 21 sc
R 72: dec, 3 sc, dec, 9 sc, dec, 3 sc [18]
R 73: 18 sc
R 74: dec, 3 sc, dec, 6 sc, dec, 3 sc [15]
R 75: 15 sc
R 76: dec, 3 sc, dec, 3 sc, dec, 3 sc [12]
R 77: 12 sc
R 78: (1 sc, dec) repeat 4 times [8]
R 79: 8 sc
Fasten off.
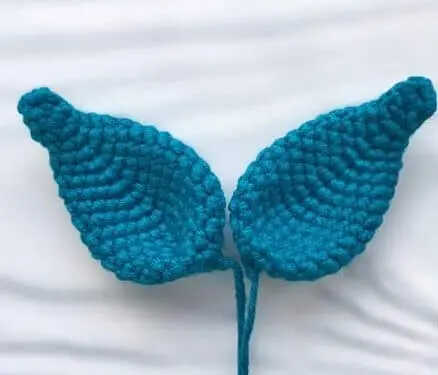
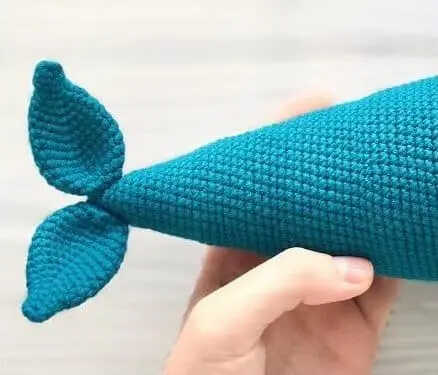
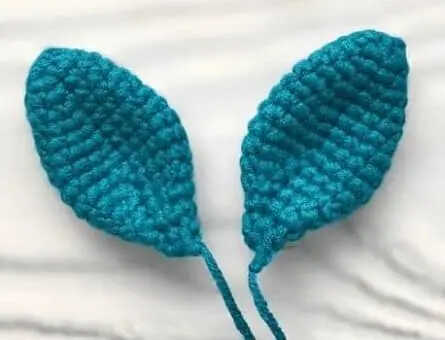
Tail
The tail consists of 2 parts.
R 1: 6 sc in magic ring [6]
R 2: 5 sc, inc [7]
R 3: 6 sc, inc [8]
R 4: 7 sc, inc [9]
R 5: 3 sc, inc, 3 sc, 2 inc [12]
R 6: 4 sc, inc, 4 sc, 2 inc, 1 sc [15]
R 7: 11 sc, 2 inc, 2 sc [17]
R 8: 12 sc, 2 inc, 3 sc [19]
R 9: 13 sc, 2 inc, 4 sc [21]
R 10: 14 sc, 2 inc, 5 sc [23]
R 11: 15 sc, 2 inc, 6 sc [25]
R 12-14: 25 sc (3 rows)
R 15: (3 sc, dec) repeat 5 times [20]
R 16: (2 sc, dec) repeat 5 times [15]
R 17: (1 sc, dec) repeat 5 times [10]
R 18: (dec) repeat 5 times [5]
Do not stuff.
Fasten off and leave a long tail for sewing.
Fins (make 2)
R 1: 6 sc in magic ring [6]
R 2: (1 sc, inc) repeat 3 times [9]
R 3: (2 sc, inc) repeat 3 times [12]
R 4: 12 sc
R 5: (3 sc, inc) repeat 3 times [15]
R 6: 15 sc
R 7: (4 sc, inc) repeat 3 times [18]
R 8: 18 sc
R 9: (5 sc, inc) repeat 3 times [21]
R 10: 21 sc
R 11: (5 sc, dec) repeat 3 times [18]
R 12: (4 sc, dec) repeat 3 times [15]
R 13: (3 sc, dec) repeat 3 times [12]
R 14: (2 sc, dec) repeat 3 times [9]
R 15: (1 sc, dec) repeat 3 times [6]
Do not stuff.
Fasten off and leave a long tail for sewing.
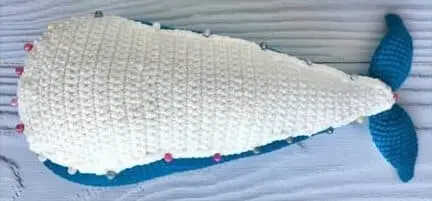
Belly
With white yarn:
Work in turning rows, which means – in the end of row turn the work and make 1 ch, start working the next row from the second stitch from the hook.
Make 4 ch.
R 1: 2 sc
R 2: 2 inc
R 3: 4 sc
R 4: 4 sc
R 5: 1 sc, 2 inc, 1 sc [6]
R 6-10: 6 sc (5 rows)
R 11: 2 sc, 2 inc, 2 sc [8]
R 12: 8 sc
R 13: 3 sc, 2 inc, 3 sc [10]
R 14-20: 10 sc (7 rows)
R 21: inc, 8 sc, inc [12]
R 22-25: 12 sc (4 rows)
R 26: inc, 10 sc, inc [14]
R 27: 14 sc
R 28: 2 inc, 10 sc, 2 inc [18]
R 29-44: 18 sc (16 rows)
R 45: 7 sc, 4 inc, 7 sc [22]
R 46-47: 22 sc (2 rows)
R 48: inc, 20 sc, inc [24]
R 49: 24 sc
R 50: inc, 22 sc, inc [26]
R 51-52: 26 sc (2 rows)
R 53: dec, 22 sc, dec [24]
R 54: 24 sc
R 55: dec, 20 sc, dec [22]
R 56: 22 sc
R 57: dec, 18 sc, dec [20]
R 58: 20 sc
R 59: dec, 16 sc, dec [18]
R 60: dec, 5 sc, 4 inc, 5 sc, dec [20]
R 61: dec, 16 sc, dec [18]
R 62: dec, 14 sc, dec [16]
R 63: dec, 12 sc, dec [14]
Fasten off and leave a long tail for sewing.
Assembly
1) Sew the tail (2 parts) to the body.
2) Sew the belly to the body.
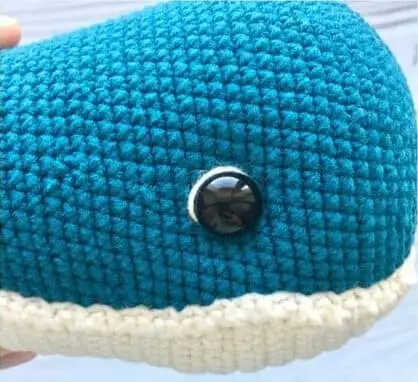
3) Glue the half beads for eyes: count 22 sc from the magic ring, 6 sc from the belly. The distance between the eyes is 44 sc.
4) Embroider eye whites using a white yarn.
5) Sew the fins to the body between R 34 and R 35, stepping back from the belly 2 sc.
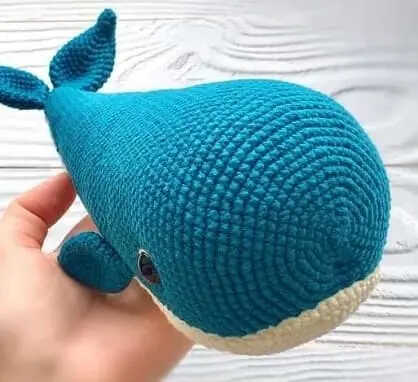
Your amigurumi whale is ready!