Designer: Knitted Comfort
Instagram: @v_ujut
Difficulty Level: Beginner
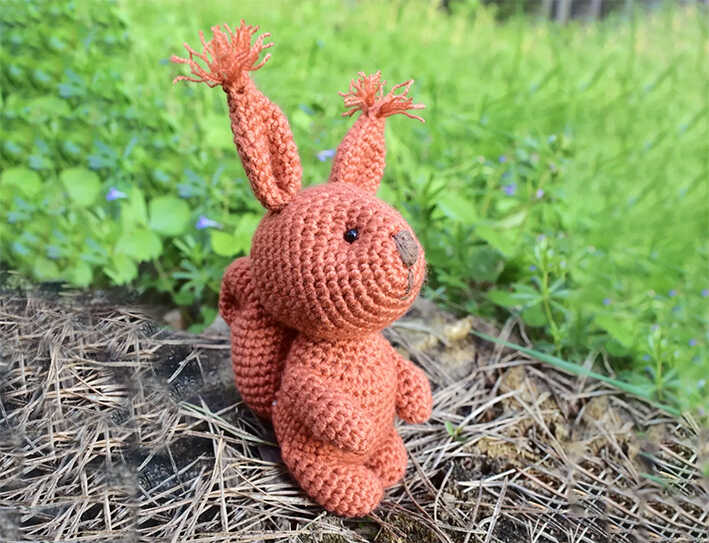
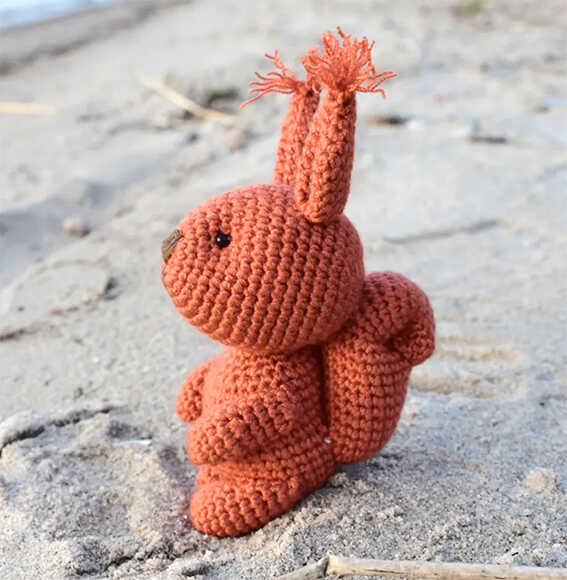
A warm and charming woodland-inspired amigurumi project to enjoy during your crochet time.
This free amigurumi squirrel pattern is designed by Knitted Comfort and inspired by the cozy and friendly nature of small forest animals. With its sweet expression and balanced proportions, this squirrel makes a lovely option for handmade gifts, nursery decor, or comforting crochet projects. You will also find inspiring amigurumi squirrel ideas shared at the very end of the pattern. Its clean and simple design fits naturally into Easy Crochet Projects and Low Sew or No Sew Amigurumi Patterns, and we sincerely thank Knitted Comfort (@v_ujut) for sharing this adorable creation.
This is a beginner amigurumi squirrel pattern written in a step by step, beginner friendly format using basic stitches only. If you have been wondering how to crochet an amigurumi squirrel that looks cute yet remains easy to follow, this tutorial is an ideal place to start. Difficulty Level: Beginner, and it also works well as a Quick to Make Amigurumi.
The pattern is designed using YarnArt Jeans cotton blend yarn for neat stitch definition and is completed with a 2.0 mm crochet hook, fiberfill stuffing, black beads for the eyes, and simple sewing tools. If you enjoy small animal projects, the tiny hedgehog amigurumi design may also offer lovely inspiration.
Materials:
- Yarn: YarnArt Jeans (55% cotton, 45% acrylic, 50 g/160 m)
- Hook size: 2.0 mm
- Black beads for eyes
- Sewing thread
- Sewing needle
- Scissors
- Fiberfill
Abbreviations:
R = row
mc = magic circle (magic ring)
sc = single crochet
inc = increase (2 sc in the next stitch)
dec = decrease (single crochet 2 stitches together)
F. o. = finish off
(…) = number of stitches you should have at the end of the round/row
(…)*6 = repeat whatever is between the brackets the number of times stated
WHY THIS AMIGURUMI SQUIRREL IS GREAT FOR BEGINNERS

Head
R 1: 6 sc in mc (6)
R 2: (inc)*6 (12)
R 3: (1 sc, inc)*6 (18)
R 4: 18 sc
R 5: (2 sc, inc)*6 (24)
R 6: 24 sc
R 7: (3 sc, inc)*6 (30)
R 8: 30 sc
R 9: (4 sc, inc)*6 (36)
R 10-16: 36 sc (7 rows)
R 17: (4 sc, dec)*6 (30)
R 18: (3 sc, dec)*6 (24)
R 19: (2 sc, dec)*6 (18)
Stuff with fiberfill.
R 20: (1 sc, dec)*6 (12)
R 21: (dec)*6 (6)
F. o.
Body
R 1: 6 sc in mc (6)
R 2: (inc)*6 (12)
R 3: (1 sc, inc)*6 (18)
R 4: (2 sc, inc)*6 (24)
R 5: (3 sc, inc)*6 (30)
R 6-15: 30 sc (10 rows)
R 16: 6 dec, 18 sc (24)
R 17: (2 sc, dec)*6 (18)
R 18-19: 18 sc (2 rows)
Stuff with fiberfill.
F. o. and leave a long tail for sewing.
Tail
R 1: 6 sc in mc (6)
R 2: (inc)*6 (12)
R 3: (1 sc, inc)*6 (18)
R 4: (2 sc, inc)*6 (24)
R 5-14: 24 sc (10 rows)
R 15: (2 sc, dec)*6 (18)
R 16-20: 18 sc (5 rows)
R 21: (1 sc, dec)*6 (12)
R 22-31: 12 sc (10 rows)
R 32: (dec)*6 (6)
R 33: (dec)*3 (3)
Stuff firmly at the beginning and lightly at the ending of the tail.
F. o.
Ears (make 2)
R 1: 4 sc in mc (4)
R 2: (1 sc, inc)*2 (6)
R 3: (2 sc, inc)*2 (8)
R 4: (3 sc, inc)*2 (10)
R 5: (4 sc, inc)*2 (12)
R 6: (5 sc, inc)*2 (14)
R 7-11: 14 sc (5 rows)
Do not stuff.
F. o. and leave a long tail for sewing.
Legs (make 2)
R 1: 6 sc in mc (6)
R 2: (inc)*6 (12)
R 3-5: 12 sc (3 rows)
R 6: (4 sc, dec)*2 (10)
R 7-8: 10 sc (2 rows)
R 9: (3 sc, dec)*2 (8)
R 10: 8 sc
R 11: (dec)*4 (4)
Stuff ¾ full.
F. o. and leave a long tail for sewing.
Arms (make 2)
R 1: 5 sc in mc (5)
R 2: (inc)*5 (10)
R 3-5: 10 sc (3 rows)
R 6: (3 sc, dec)*2 (8)
R 7-10: 8 sc (4 rows)
Stuff ½ full.
F. o. and leave a long tail for sewing.
Assembly
1. Sew the head to the body.
2. We wrap the top part of the tail and sew it to hold the resulting “roll”. Then we sew the tail with the lower part to the body and the upper part to the head.
3. Fold the ears in half and sew them to the top of the head.
4. We make ear tufts with an orange yarn.
• To make ear tufts cut 2-3 cm (0.8-1.1″) yarn pieces. For one ear you will need four pieces.
• Attach yarn pieces to the ear as a fringe: fold yarn piece in half to create a loop. Insert your crochet hook through the stitch of ear. Grab the folded end of the fringe and pull it through the stitch. Pass the loose ends through the loop and pull tight.
• Separate the yarn into fibers. Trim the ends of the fibers.
5. Sew black beads for eyes.
6. Sew the arms and legs to the body.
7. Embroider a nose using a brown yarn.