Designer: VikGoldFish
Instagram: @vikgoldfish
Difficulty Level: Beginner
A gentle countryside-inspired amigurumi project for relaxed crochet moments.
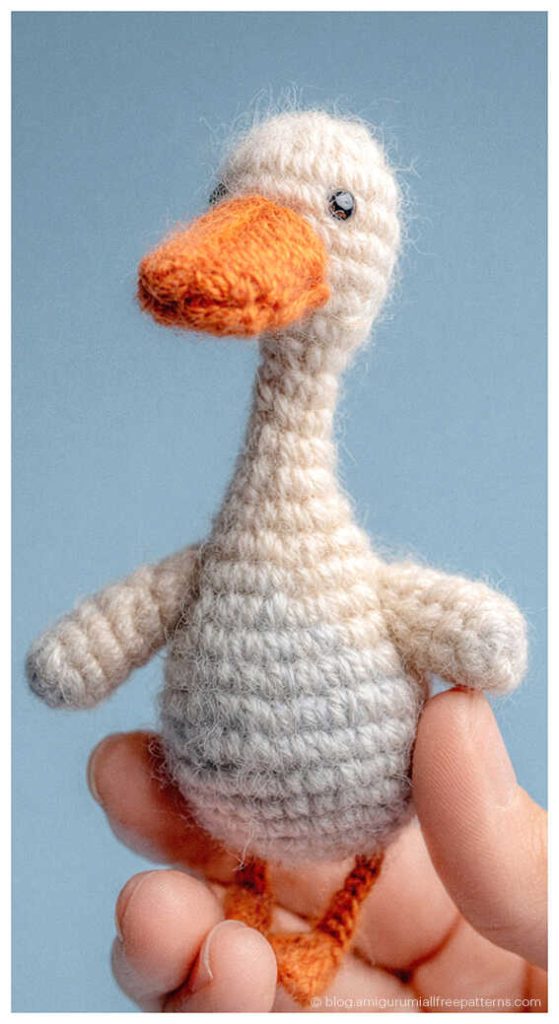
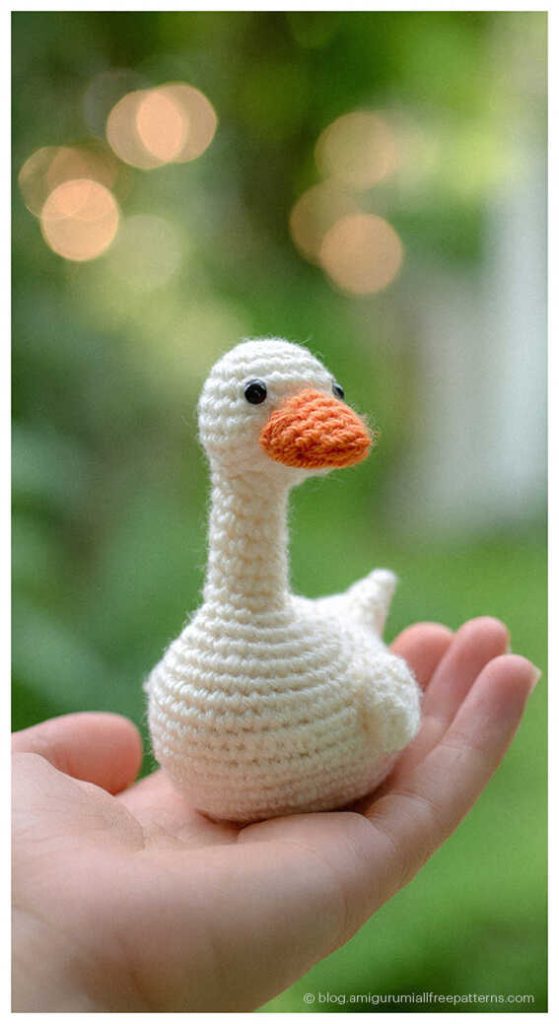
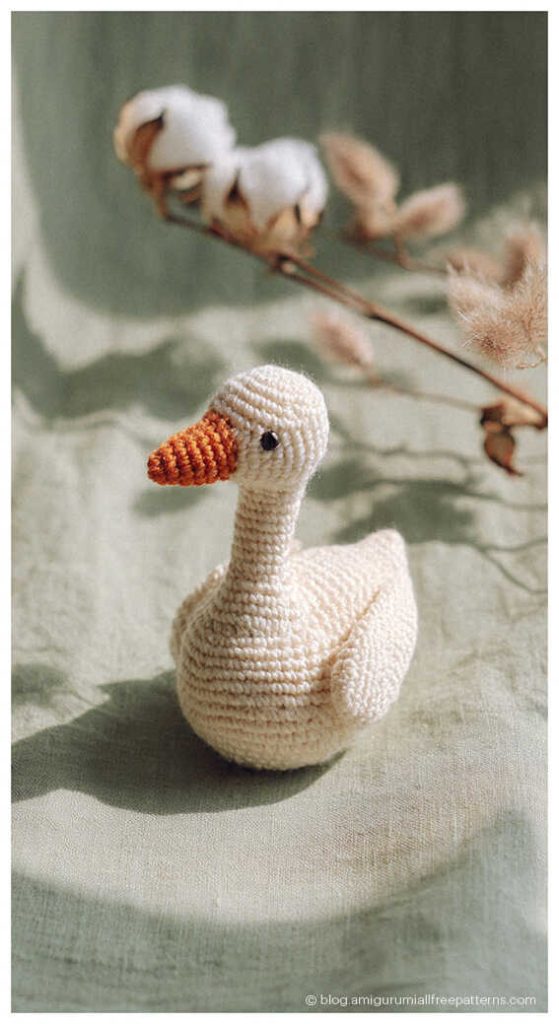
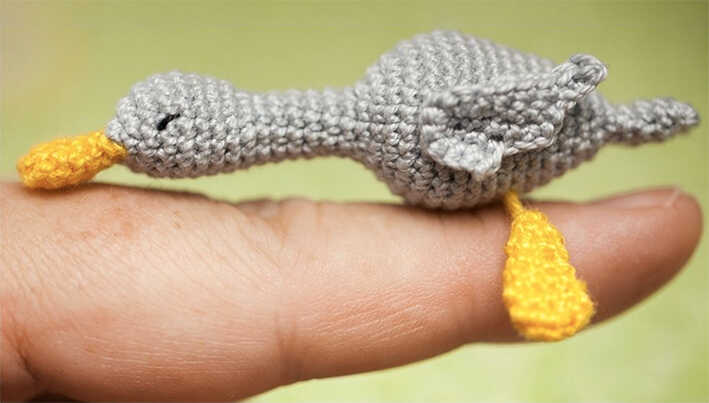
This free amigurumi goose pattern is inspired by the calm charm of rustic farm life. With its lying pose and soft character, this goose makes a lovely choice for DIY Crochet Gift Ideas, nursery decor, or cozy handmade toys. You will also find inspiring amigurumi goose ideas shared at the very end of the pattern. Clean and balanced shapes like this fit naturally into Easy Crochet Projects, and we sincerely thank VikGoldFish (VK) for sharing this beautiful goose design.
This is a beginner-friendly amigurumi goose pattern written in a step by step, easy-to-follow format using basic stitches. A simple wire armature placed inside the body helps the goose keep its relaxed shape, while the eyes are embroidered with black thread for a soft, handmade finish. If you have been wondering how to crochet an amigurumi goose with a clear structure and gentle details, this pattern is a great place to start.
The pattern is crocheted using Pekhorka Openwork yarn or a similar yarn with the same yardage, paired with a 0.9 mm crochet hook for fine stitch definition. To complete the project, you will need fiberfill stuffing, aluminum wire, stitch markers, pins, and basic sewing tools. If you enjoy animal designs, amigurumi lamb ideas shared at the end may also inspire you.
Materials and Tools
• Pekhorka Openwork yarn (280 m / 50 g): yellow (12), black (02), white (01)
• Crochet hook 0.9 mm
• Fiberfill stuffing
• Stitch markers
• Pins
• Aluminum wire 1 mm – 15 cm
• Needle for sewing parts
• Scissors
Abbreviations
MR – magic ring
ch – chain
sc – single crochet
dc – double crochet
inc – increase
dec – decrease
sl st – slip stitch
PS – shift stitch
(…) x n – repeat the instructions in parentheses n times
FREE GOOSE AMIGURUMI PATTERN FOR BEGINNERS
Legs (make 2)
Use yellow yarn.
Leave a 20 cm yarn tail at the beginning.
R1: ch 4, starting from the 2nd ch from hook – 2 sc, 3 sc in last ch, on the other side of the chain – sc, inc = 8
R2: (3 sc, inc) x 2 = 10
Pull the starting yarn tail to the outside.
R3: (3 sc, dec) x 2 = 8
R4: (2 sc, dec) x 2 = 6
R5–R6: 6 sc (2 rounds)
Cut the yarn, leaving about 15 cm.
Close the opening through the front loops only, do not cut the yarn.
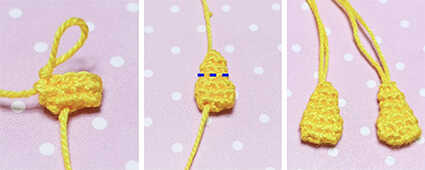
Using the starting yarn tail, sew the leg to give it a flat shape, approximately between R4 and R5.
Bring the yarn to the top center.
You should now have two yarn tails at the top of the leg.
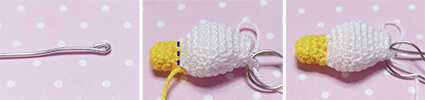
Head and Body
Use yellow yarn. Place a stitch marker on the side.
R1: ch 4, starting from the 2nd ch from hook – 2 sc, 3 sc in last ch, on the other side of the chain – 1 sc, inc = 8
R2–R4: 8 sc + PS (3 rounds)
Change yarn to white, leaving about 20 cm of yellow yarn outside.
R5: 4 inc, 4 sc = 12
R6: (sc, inc) x 2, (inc, sc) x 2, 4 sc = 16
R7: 3 sc, inc, 4 sc, inc, 7 sc = 18
R8–R10: 18 sc + PS (3 rounds)
R11: 3 sc, dec, 4 sc, dec, 7 sc = 16
R12: 2 sc, dec, 4 sc, dec, 6 sc = 14
R13: sc, 4 dec, 5 sc = 10
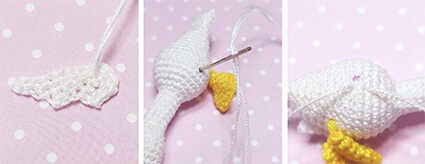
Cut a piece of aluminum wire about 15 cm long.
Make a small loop at one end.
Insert the loop into the beak until it stops.
Sew along the color change line to secure the wire and give the beak a flat shape.
Stuff the head.
R14–R21: 10 sc (8 rounds)
Stuff the neck lightly.
R22: (sc, inc) x 5 = 15
R23: (2 sc, inc) x 5 = 20
R24: (3 sc, inc) x 5 = 25
R25: (4 sc, inc) x 5 = 30
R26–R28: 30 sc (3 rounds)
R29: (8 sc, dec) x 3 = 27
R30: (7 sc, dec) x 3 = 24
R31: (6 sc, dec) x 3 = 21
R32: 21 sc
Mark two points one round above, centered on the belly, with 2 stitches between them.
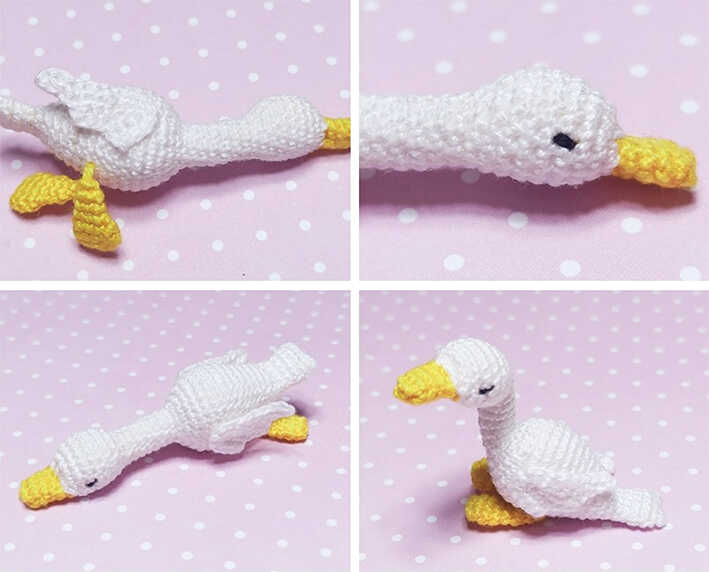
Attach the legs by pulling the leg yarn tails through the marked points and tying them inside the body.
Do not pull too tightly so the legs can move slightly.
You may attach each leg separately or tie all four yarn tails together, as preferred.
R33: (5 sc, dec) x 3 = 18
R34: 18 sc
R35: (4 sc, dec) x 3 = 15
R36: 15 sc
R37: (3 sc, dec) x 3 = 12
Stuff the body.
R38: (2 sc, dec) x 3 = 9
R39: (2 sc, inc) x 3 = 12
R40–R41: 12 sc (2 rounds)
Stuff the body. Do not stuff the tail.
Optionally, you may add a small weight (such as glass granules) to the back half of the body to help the goose sit better.
This step is optional and may be skipped.

Adjust by crocheting or undoing 1–2 stitches so the end of the round is exactly on the side.
Cut the wire, leaving a small amount to bend a loop.
Bend the wire loop so it is hidden inside the tail.
Fold the tail in half and crochet both sides together through the inner loops only: 6 sc.
Leave a yarn tail about 20 cm long.
Using the remaining yarn, sew the tail flat and secure the wire inside.
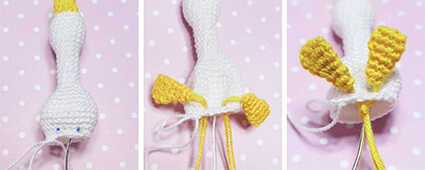
Wings (make 2)
Use white yarn.
R1: ch 6, starting from the 2nd ch – 4 sc, 3 sc in last ch, on the other side of the chain – 2 sc, turn
R2: ch 1, starting from the 2nd ch – 2 sc, 3 inc, 4 sc, ch 3, turn
R3: starting from the 2nd ch – 5 sc
Cut the yarn, leaving about 15 cm.
Make an invisible join, secure the yarn, do not cut it.
Bring this yarn to the beginning of the piece.
Make sure the yarn tails are on opposite sides so you get a left and right wing.
Mark the wing attachment points on the body, approximately between R26 and R27.
Insert both wing yarn tails into the attachment point, bring them out on the opposite side of the body under the attachment point, with 1 stitch between them.
Pull the yarn tight, tie a knot, and hide the knot inside the body.
Attach the second wing in the same way.
Face and Finishing
Embroider the eyes with black thread.
Black beads may also be used for the eyes.
Your Mini Goose is finished.
Copyright & Credits
This pattern is designed by VikGoldFish. You may sell finished toys made from this pattern; however, the pattern itself may not be published, redistributed, copied, translated, or shared in any form without the designer’s prior permission. When sharing photos of your finished work, please credit the designer by tagging @vikgoldfish_group.
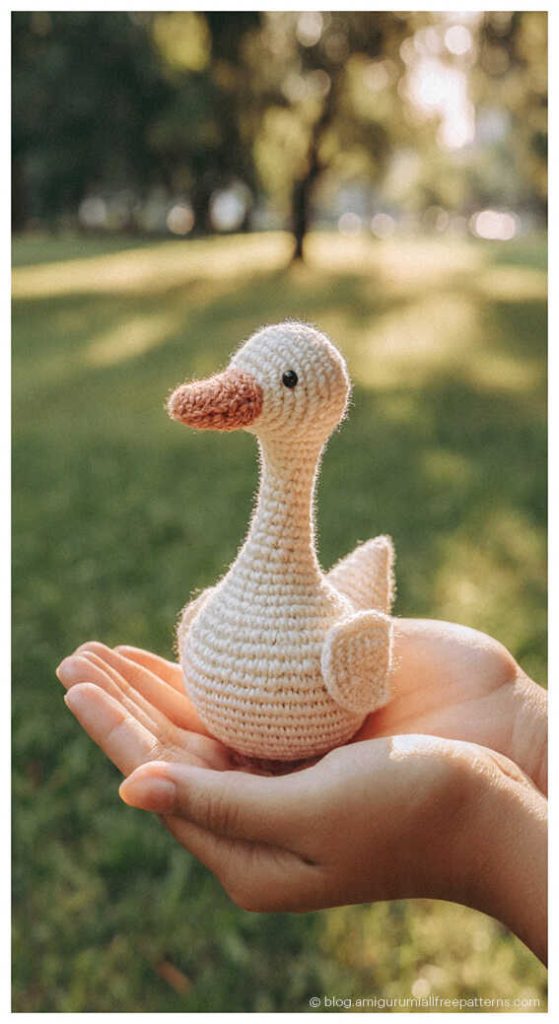
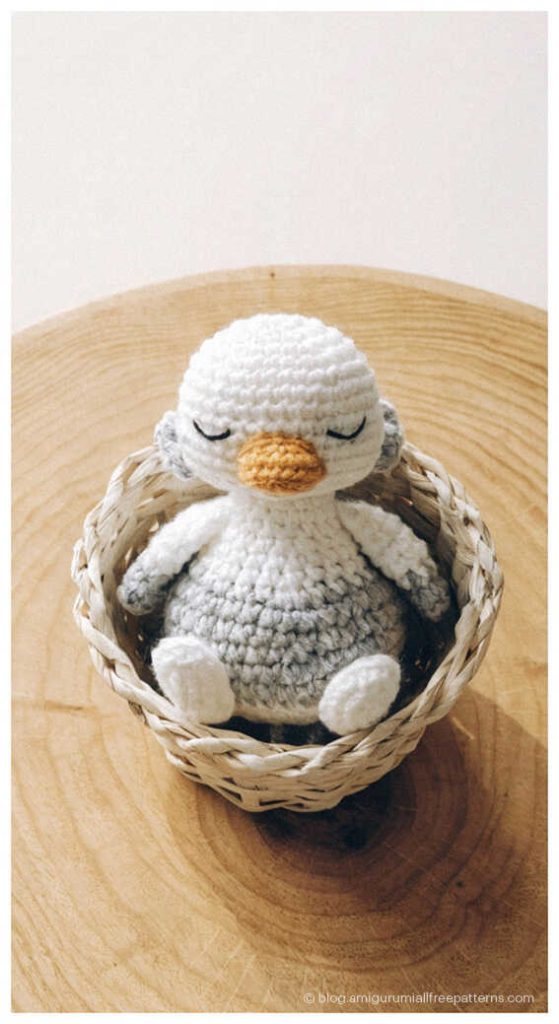
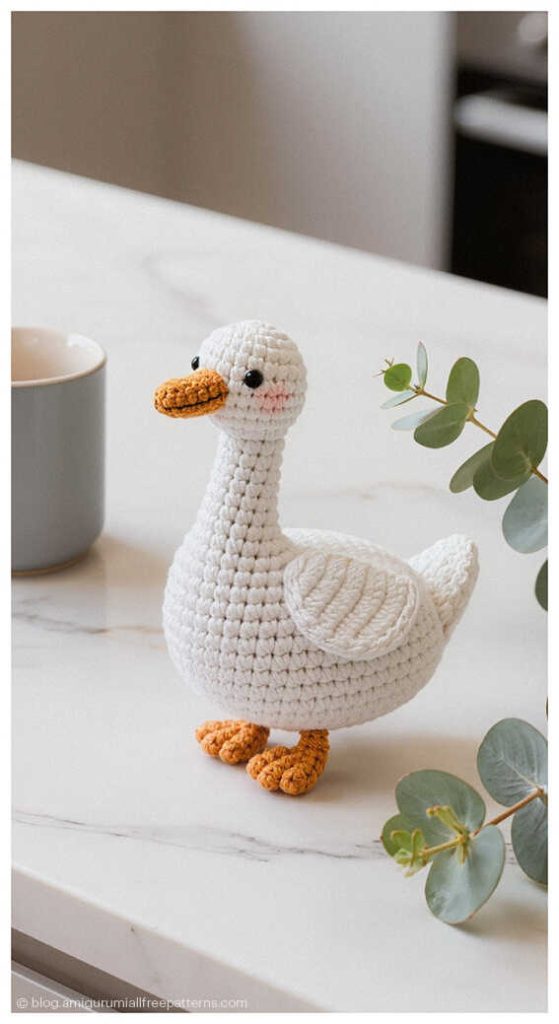
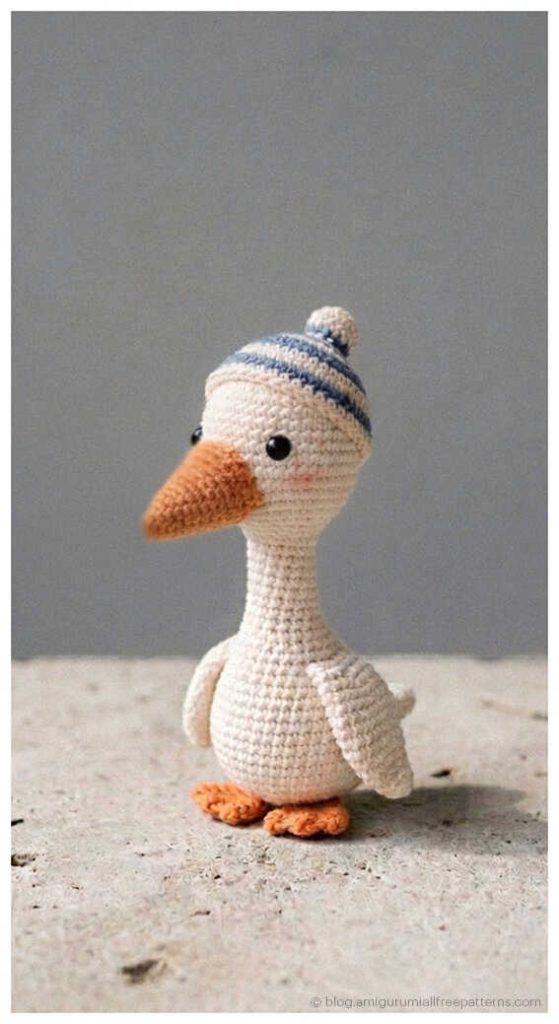
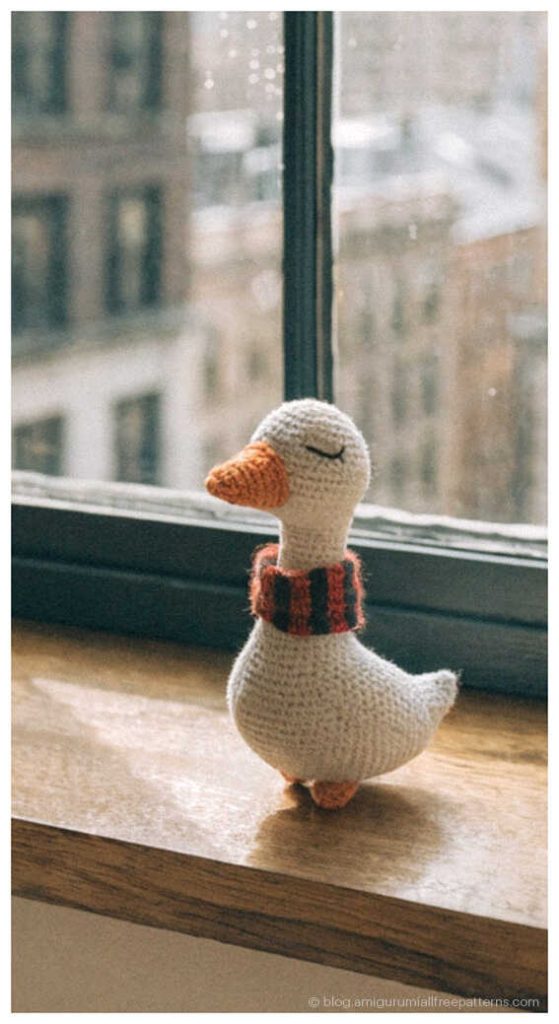
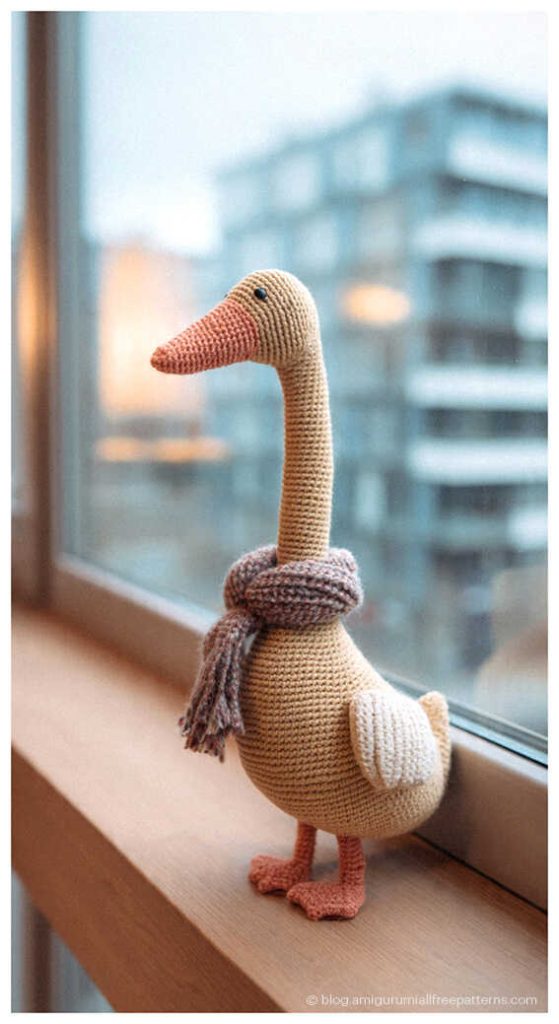
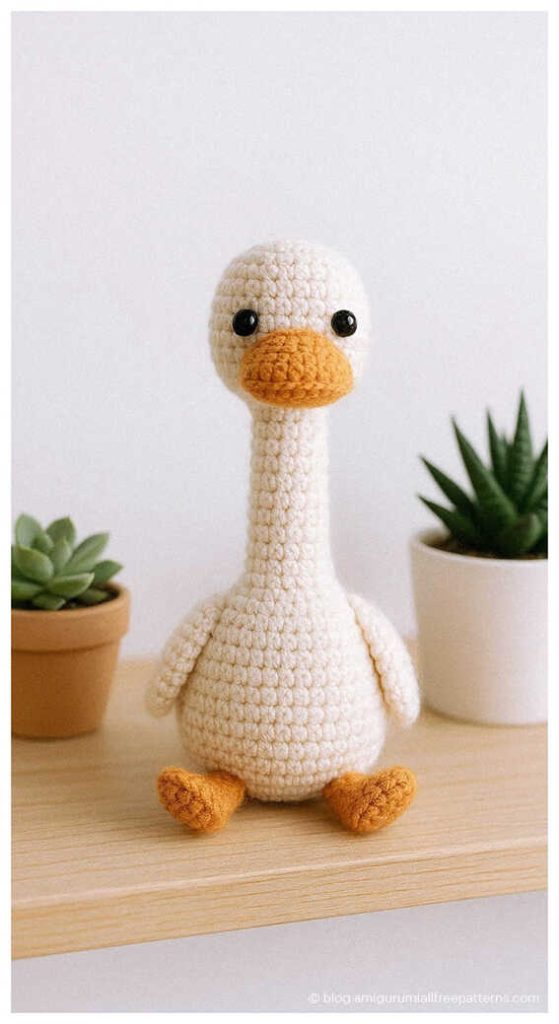
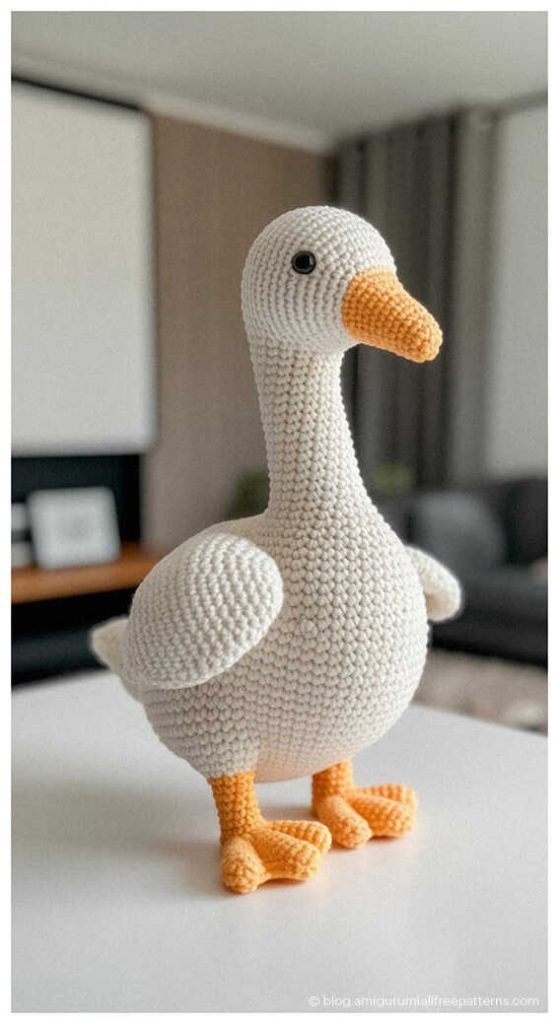
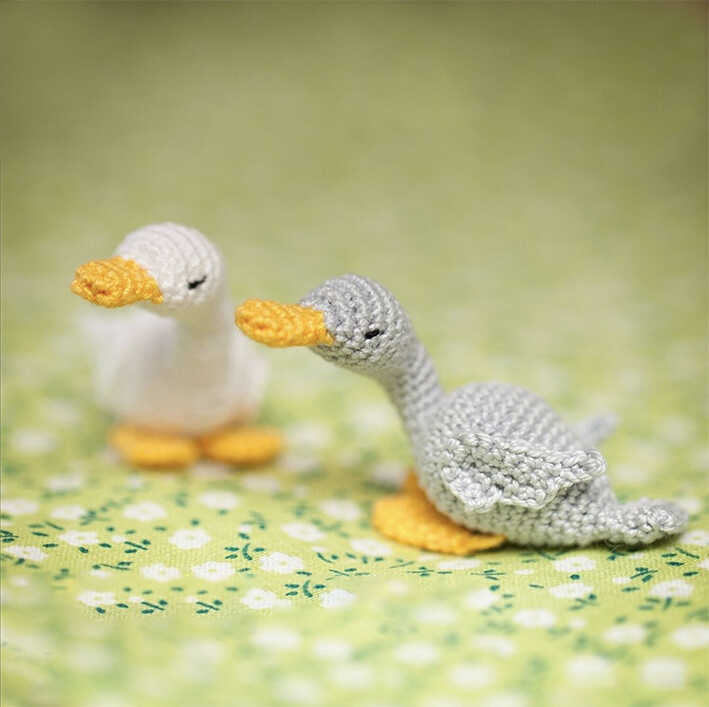
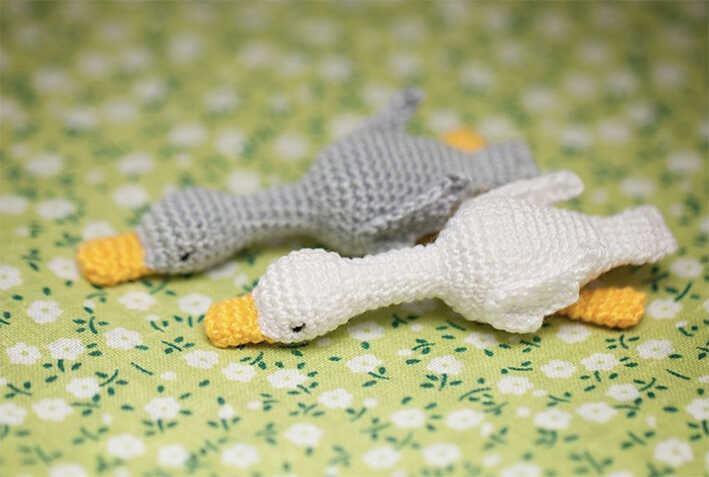
Soft and charming, crochet geese bring a cozy farmhouse feel to amigurumi projects. These adorable designs highlight simple shapes, gentle colors, and sweet handmade details that make them perfect for decor, gifts, or relaxing crochet time.
Cute Amigurumi Goose Designs for Your Next Crochet Project