Designer: Iskorka Toys
Instagram: @iskorka_toys
VK: @iskorka_toys
Difficulty Level: Intermediate
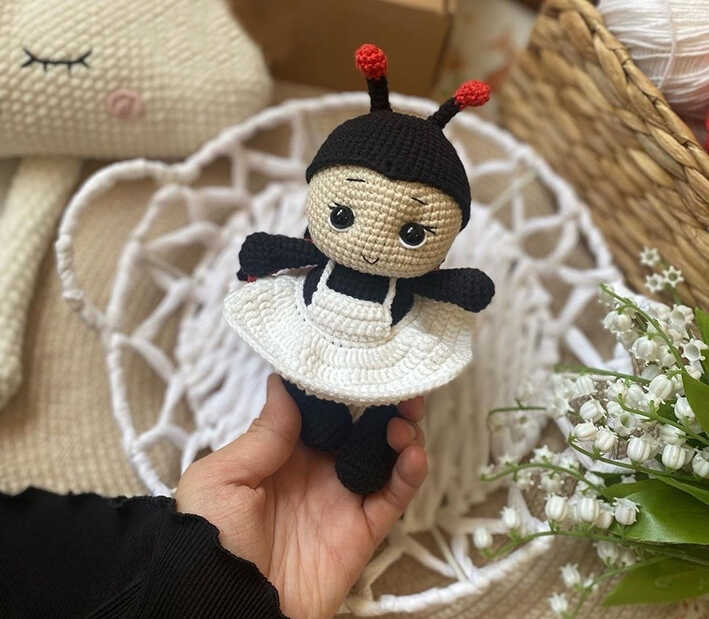
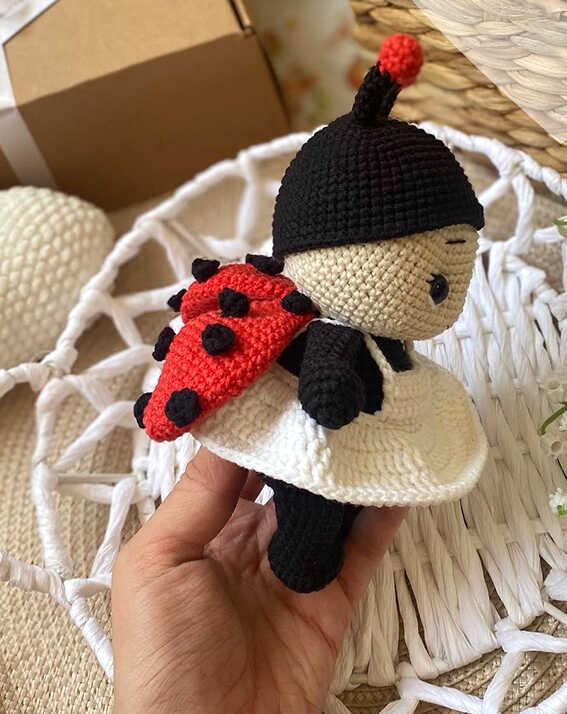
A cheerful ladybug to brighten your crochet collection
This free cute ladybug amigurumi pattern is designed by Iskorka Toys (@iskorka_toys) and brings a playful, nature-inspired character to life. With its rounded shape and bold red-and-black colors, this charming ladybug is perfect for DIY crochet gift ideas, spring décor, or sweet handmade toys. Its thoughtful shaping and clean structure make it a great fit for easy crochet projects with a slightly advanced touch. We sincerely thank the designer for sharing this delightful creation, and you will also find inspiring ladybug ideas at the end of the pattern.
Ready to make this adorable ladybug? Scroll down to access the original pattern source and begin your crochet project.
This design is best suited for an intermediate amigurumi level, offering enjoyable shaping and character details without becoming overly complex. If you enjoy small nature-inspired toys, you might also love the mini bee shared on our other blog, which pairs beautifully with garden-themed collections.
The pattern uses YarnArt Jeans cotton yarn with a 2 mm crochet hook, along with safety eyes, polyester stuffing, and basic tools. Cotton yarn ensures a crisp finish, while velvet yarn can create a larger plush version. For another cute companion, explore the tiny turtle featured on our blog.
Materials and Tools
• YarnArt Jeans: 26-red, 05-flax, 01-white, 53-black
• 2 mm crochet hook
• 10 mm safety eyes
• Polyester stuffing
• Stitch markers
• Pins
• Wire
• Tapestry needle
• Scissors
Abbreviations
MR – magic ring
sl st – slip stitch
ch – chain
sc – single crochet
dc – double crochet
tr – treble crochet
hdc – half double crochet
inc – increase
dec – decrease
(…) × n – repeat n times
FREE LADYBUG AMIGURUMI PATTERN DETAILS
Head and Body
Start with color 05.
R1: 6 sc in MR
R2: 6 inc (12)
R3: (1 sc, inc) × 6 (18)
R4: (2 sc, inc) × 6 (24)
R5: (3 sc, inc) × 6 (30)
R6: (4 sc, inc) × 6 (36)
R7: (5 sc, inc) × 6 (42)
R8: (6 sc, inc) × 6 (48)
R9: (7 sc, inc) × 6 (54)
R10: (8 sc, inc) × 6 (60)
R11–R20: 60 sc
Insert 10 mm safety eyes between R15 and R16, spaced 10 stitches apart. Stuff the head and body as you go.
R21: (8 sc, dec) × 6 (54)
R22: (7 sc, dec) × 6 (48)
R23: (6 sc, dec) × 6 (42)
R24: (5 sc, dec) × 6 (36)
R25: (4 sc, dec) × 6 (30)
R26: (3 sc, dec) × 6 (24)
R27: (2 sc, dec) × 6 (18)
Change to black yarn and cut the light yarn.
R28: (2 sc, inc) × 6 (24)
R29: (2 sc, inc) × 8 (32)
R30: (7 sc, inc) × 4 (36)
R31: 36 sc
R32: (5 sc, inc) × 6 (42)
R33–R34: 42 sc
R35: (6 sc, inc) × 6 (54)
R36–R38: 54 sc
R39: (7 sc, inc) × 6 (54)
R40–R43: 54 sc
R44: (7 sc, dec) × 6 (48)
R45: (6 sc, dec) × 6 (42)
R46: (5 sc, dec) × 6 (36)
R47: (4 sc, dec) × 6 (30)
R48: (3 sc, dec) × 6 (24)
R49: (2 sc, dec) × 6 (18)
R50: (1 sc, dec) × 6 (12)
R51: 6 dec
Close the gap, fasten off and weave in the end.
Second Head Piece
R1: 6 sc in MR (6)
R2: 6 inc (12)
R3: (1 sc, inc) × 6 (18)
R4: (2 sc, inc) × 6 (24)
R5: (3 sc, inc) × 6 (30)
R6: (4 sc, inc) × 6 (36)
R7: (5 sc, inc) × 6 (42)
R8: (6 sc, inc) × 6 (48)
R9: (7 sc, inc) × 6 (54)
R10: (8 sc, inc) × 6 (60)
R11–R18: 60 sc
R19: 28 sc, 1 hdc, 1 dc, 1 tr, 1 dc, 1 hdc, 27 sc, sl st
You may either cut the yarn leaving a long tail for sewing or weave in the end and glue the piece later.
Upper Arms (2 pcs)
R1: 6 sc in MR (6)
R2: 6 inc (12)
R3: (1 sc, inc) × 6 (18)
R4: 18 sc
R5: (4 sc, dec) × 3 (15)
R6: 3 sc, 4 dec, 4 sc (11)
R7–R13: 11 sc
Make 1 shift stitch so the arms face forward. Fold in half and crochet both sides together with 5 sc. Leave a long tail for sewing.
Lower Legs (2 pcs)
R1: 6 sc in MR (6)
R2: 6 inc (12)
R3: (1 sc, inc) × 6 (18)
R4: (2 sc, inc) × 6 (24)
R5–R6: 24 sc
R7: 4 sc, 10 dec (14)
R8–R14: 14 sc
Work 1 shift stitch, fold in half, and close with 5 sc. Leave a tail for sewing.
Wings (2 pcs)
Use red yarn.
R1: 6 sc in MR (6)
R2: 6 inc (12)
R3: (1 sc, inc) × 6 (18)
R4: 18 sc
R5: (2 sc, inc) × 6 (24)
R6: 24 sc
R7: (3 sc, inc) × 6 (30)
R8: 30 sc
R9: (4 sc, inc) × 6 (36)
R10–R12: 36 sc
R13: (4 sc, dec) × 6 (30)
R14–R15: 30 sc
R16: (3 sc, dec) × 6 (24)
R17: 24 sc
R18: (2 sc, dec) × 6 (18)
R19: 18 sc
R20: (1 sc, dec) × 6 (12)
R21: 12 sc
Fold the wings and close with 6 sc. Leave a long tail for assembly.
Antennae (2 pcs)
Start with red yarn.
R1: 6 sc in MR
R2: 6 inc (12)
R3: 12 sc
R4: 6 dec (6)
Switch to black yarn, lightly stuff, and add wire if desired.
R5–R10: 6 sc
Fasten off, leaving a tail.
Assembly
Place the second head piece over the head and sew or glue into place.
Sew upper arms under the head between R29 and R30.
Sew lower legs directly above the arms between R43 and R44.
Sew antennae between R3 and R5.
Sew wings between R28 and R29.
Embroider eyebrows and eyelashes with single black thread.
Add white highlights on the eyes.
Sew spots onto the wings.
Copyright & Credits
This pattern is designed by Iskorka Toys (@iskorka_toys). Please do not copy, reproduce, or redistribute this pattern. You may sell finished items made from this design with proper credit to the designer.